

I’d love to connect with you! Sign up for my monthly newsletter, "Garden Bliss & Blunder”
TAKE YOUR GARDEN FROM
LOUSY TO LUSH
IN
TEN STEPS
It’s been said that our gardens, like our attitudes, are what we make of them.. I agree.
I always want a perfect garden and I want it to be perfect - right now. But that tough character trait, patience, is sometimes just beyond my grasp.
It isn’t enough to plant a few flowers and have an instant garden without unlimited funds.
A young garden, planted mostly with perennials, will likely keep us waiting a couple of years before giving that ‘wow’ factor.
But if you are like me, in the meantime, I still want it to look ‘lush’.
So I needed to find other ways to make a beautiful garden while I wait.
Well-known gardener, Gertrude Jekyll said;
“ It is just in the way it is done that lies the whole difference between commonplace gardening and gardening that may rightly claim to rank as a fine art.”
Perhaps she means that no matter what we do, we should do it with all our heart and in the end, our garden will please not only our eyes, but those who come to visit.
Here are some things that have worked for me.
These ten steps won’t necessarily guarantee that instant ‘wow’ factor but they will offer some measure of lushness;
no matter if your end goal is 10 days, 10 weeks, 10 months or even 10 years away.
STEP ONE:
Start where you are, with what you have.
Make a list of what you have: a few inherited perennials, shrubs, trees; a nice view, good -or not so good soil -too many weeds or unknown plants; an overgrown garden or no garden… a few colourful pots, a good garden shed or even one that is falling down….list them all.

Take photos to see objectively how your garden looks now. A photo will show you what your brain does not want to see, or your eyes miss when you look around.
STEP TWO:
Make a rough sketch.
You don’t have to be an artist, this is just a sort of reminder sketch: mark what is there:
Where is the sun? part sun? part shade or full shade?
Mark the trees, shrubs, grass, paths, patios and buildings
Where does your eye go first when you enter the space?
All of these contribute to the foundation or the bones; the starting point of your garden.
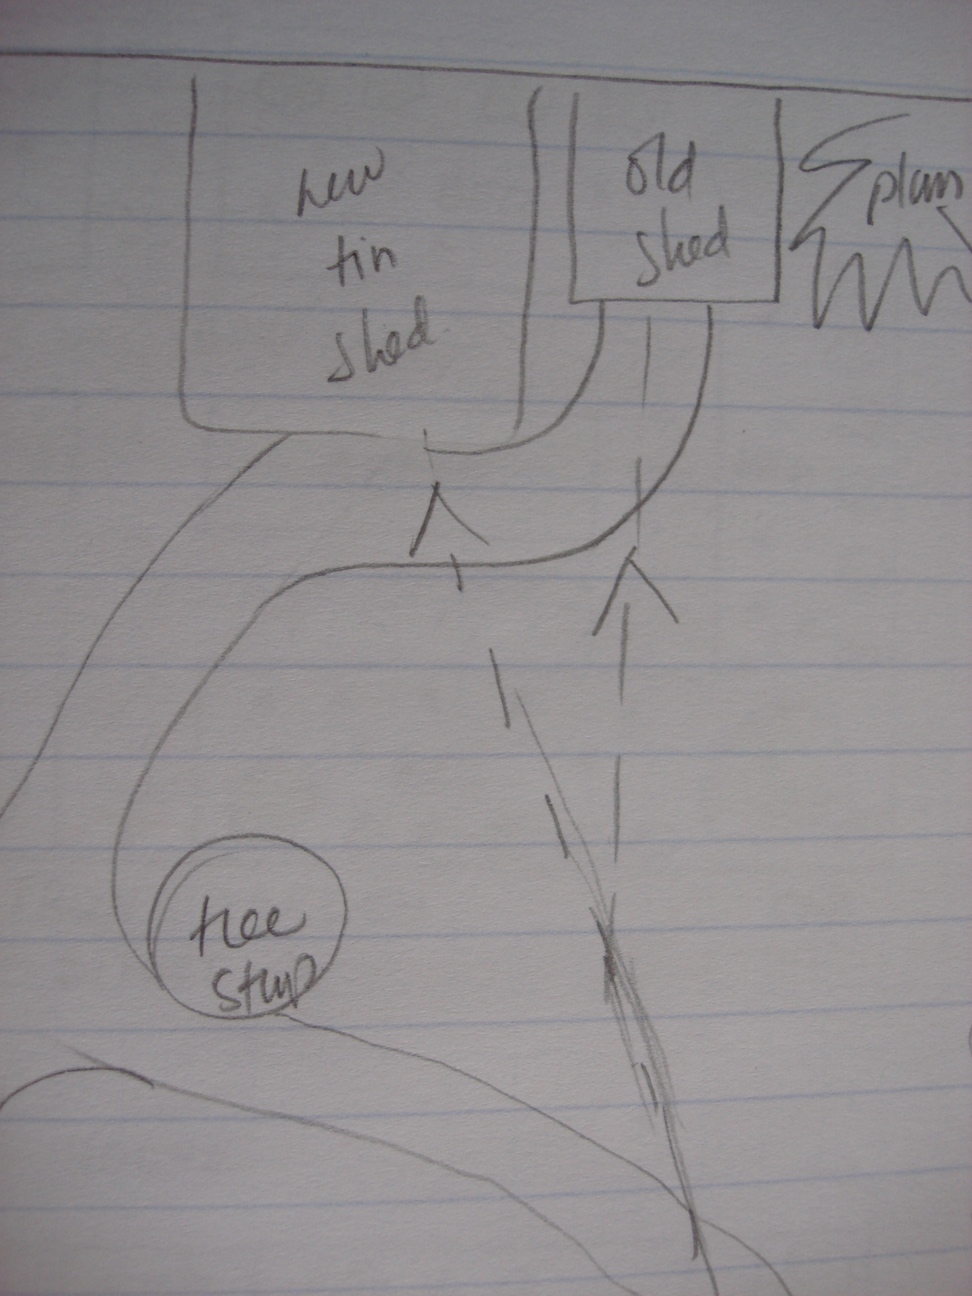
It can be this rough..... or....
A little more detailed.
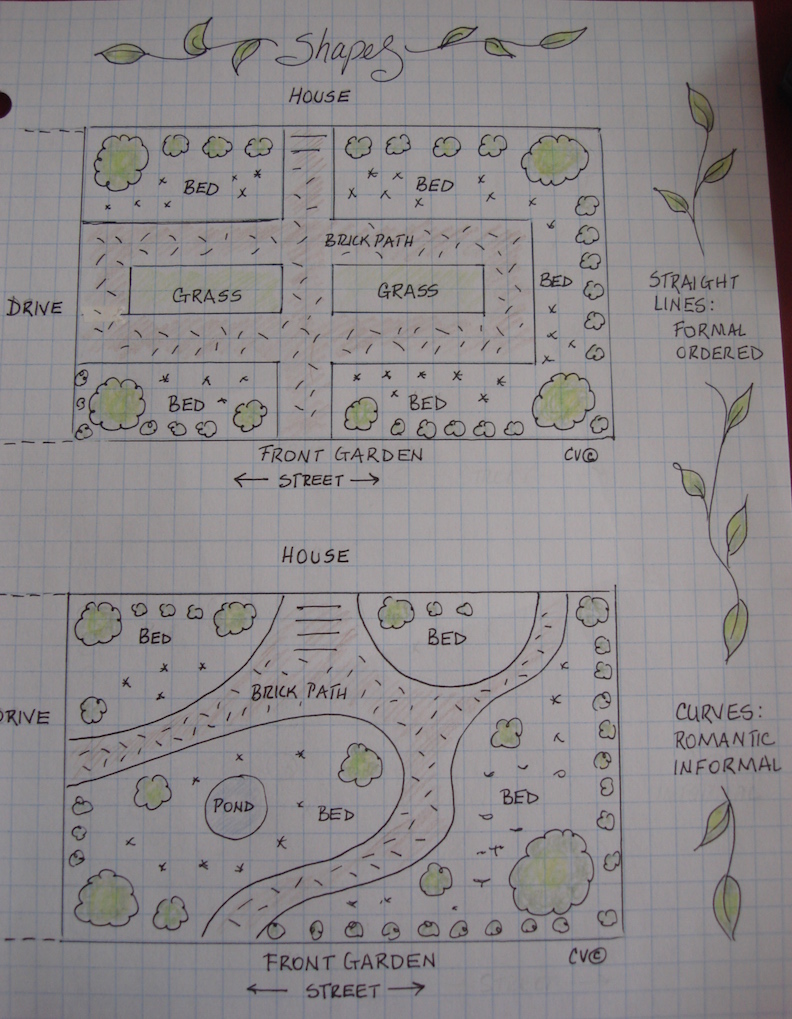
STEP THREE:
Make a list:
what is missing, what do you like or don’t like?
What do you want to do first? what is a pressing need? privacy? a place to sit? a place for the kids or pups to play?
New beds with sensuous curves, or do you prefer more formal lines?
Do you want more or less grass, another tree, a new path; more flowers, and vegetables?.
Consider all four seasons and what you can do now.
You may need a new sketch for each season to add to your plan.
STEP FOUR:
Clean up.
Begin where you will see the most difference right away.
Do what you can now (as long as it is garden season, that is)
Remove sticks, dead plants, and especially weeds.
Nutrients come from air, light and soil. If the garden is overgrown, the weeds will take the nutrients and block essential light.
TIP:
Keep weeds from spreading by spending 10 minutes a day for a very large garden or 10 minutes a week for a small garden.
*Plan your work so the green waste will be picked up close to the days you weed.
You could place a few pots full of colour here and there till you can do more.
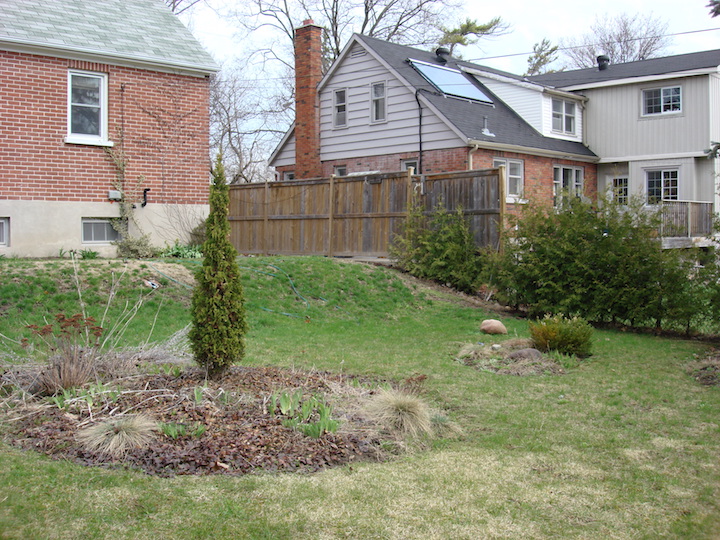
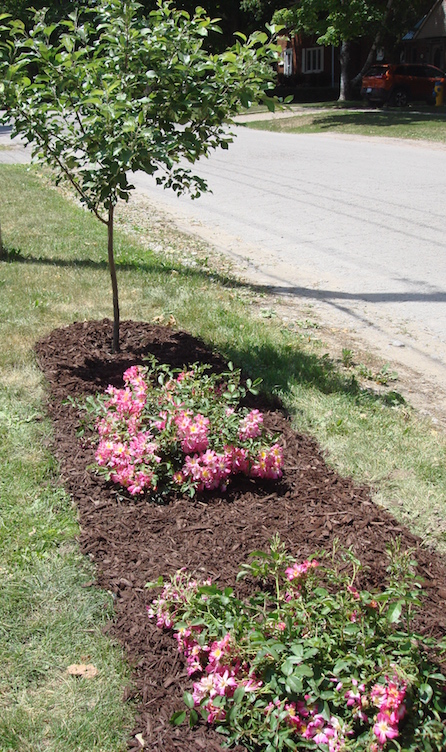
Wow...look at this crab-grass where I want my garden !
STEP FIVE:
Edge your beds:
It makes your garden look intentional and gives definition to the lines of the beds.
You can edge by leaving a strip of soil showing against the grass for a clean and crisp look.
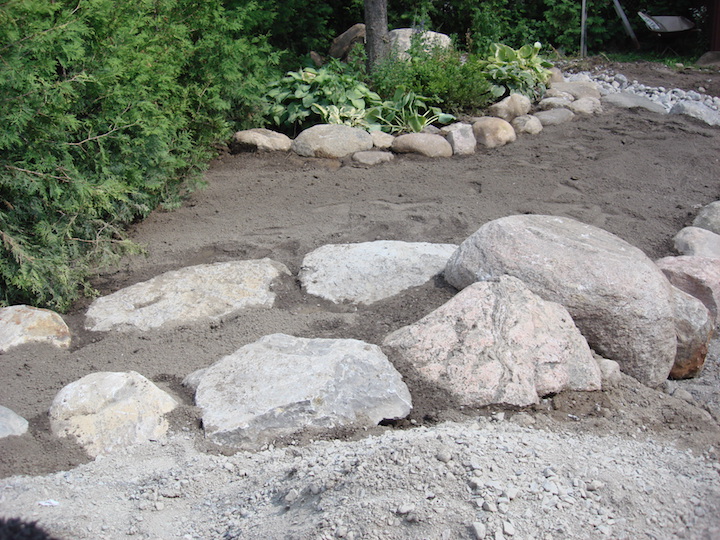
Or - with found objects.
These large boulders were discovered when we dug the foundation for the new addition. You could also edge with smaller stones, river rock, bricks or flat manufactured stone.
STEP SIX:
Add Compost and mulch:
-poor soil will never make a beautiful garden or a productive one.
If you cannot afford a soil test, you will never go wrong with adding compost. Rich soil (more here) will help the little root ends to find and retain the nutrients they need to thrive.
Mulch with shredded bark like Hemlock and other soft wood, decompose, adding nutrients while keeping soil moist, neat and mostly weed-free. Weeds coming through are easy to pull.
*Always ask what your mulch is made of and where it comes from. Read the label and be sure you are getting wood mulch and not a mixture of unknown material. If a colour is added to your mulch, be sure it is a vegetable dye and not a petroleum product. Some dyes may affect some plants.
Question: when you cover your garden with coloured mulch, do you want folks to say "Nice mulch." or do you want them to say "Nice Garden"?
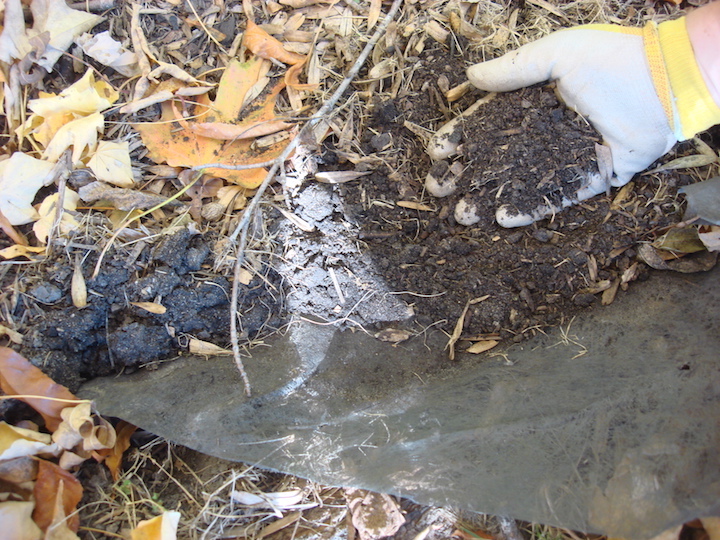
Good organic compost is dark and full of nutrients.
Shredded bark mulch keeps weeds down, moisture in while it decomposes into rich, nutrient-dense soil.
(...and it looks good)
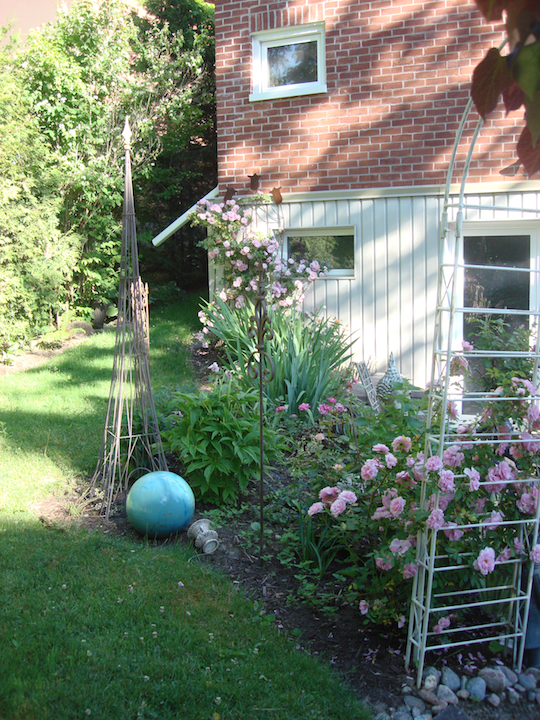
STEP SEVEN:
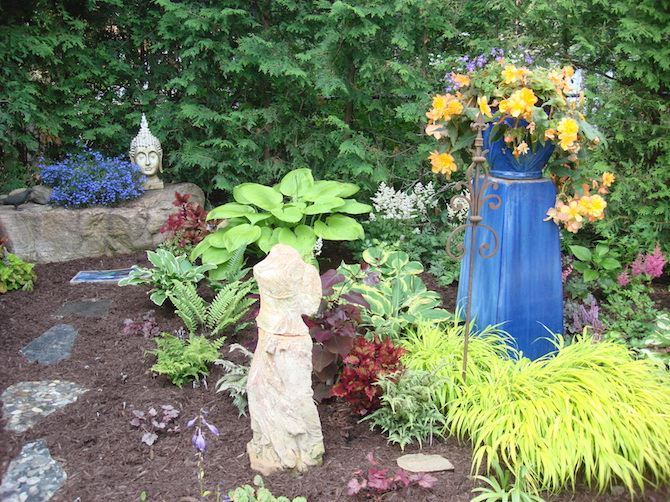
You will need a focal point.
Focal points in your design, give your eye somewhere interesting to go.
A found object, birdbath, a funky piece of scrap iron or a brightly painted chair with a pot of flowers in the seat.
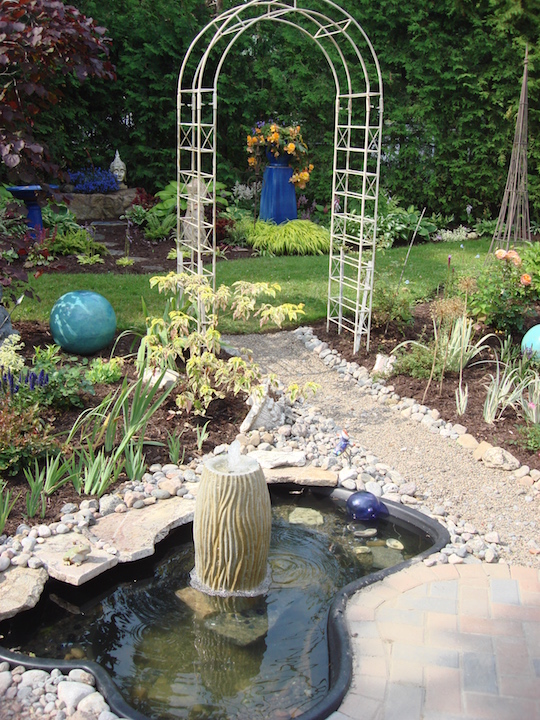
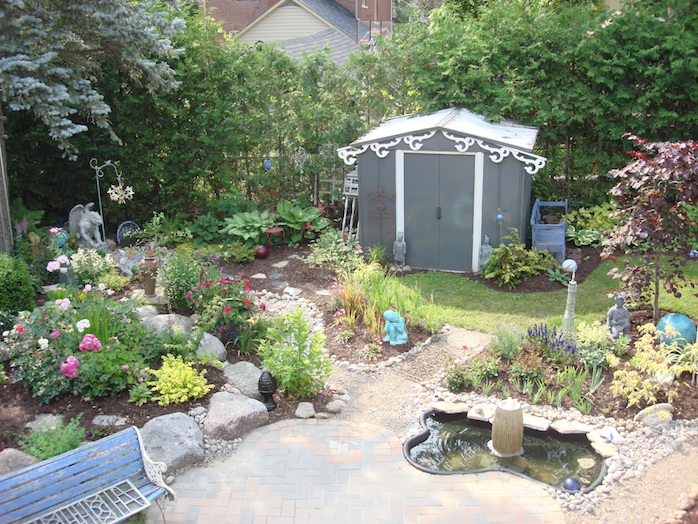
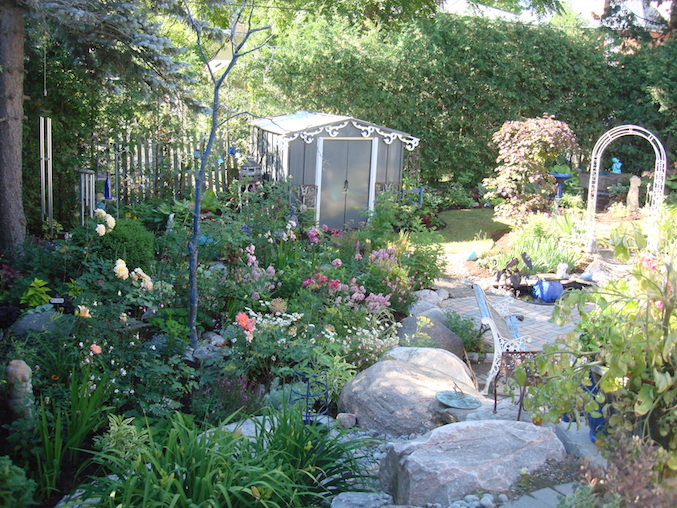
In this photo above, your eye wanders from the water feature, to the arbour and then into the back bed with a blue pillar and a contrasting flower.
The idea is to have your eye travel from one interesting part of the garden to another. Some of these objects were found, salvaged, bargained for or made from other things.
In a small garden, the hardest part of the design, is making separate spaces (or rooms in a larger garden). So to fool the eye, a focal point in each area can often do the trick.
Imagination is key in any garden.
STEP EIGHT:
Add plants as you can afford.
Annuals can fill gaps while perennials grow large enough to divide.
Replace dead plants.
Better a bare spot than a withered bit of brown amongst the green.
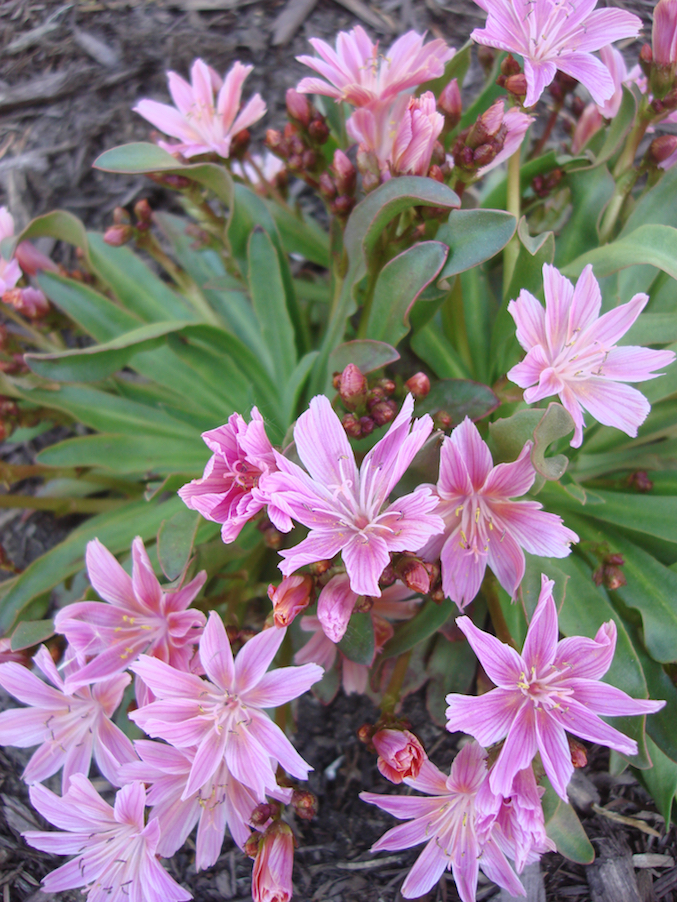 |
 |
Left: Lewisia (a sweet, twice blooming perennial alpine and Right: Iris
STEP NINE:
Water deeply
so your garden doesn’t dry out and your plants don’t have to work too hard.
Water at the root instead of on the leaves to discourage pests and disease.
The soil should be moist down at least an inch below the surface. How do you tell? Stick your finger down into the earth; if you can, and it is moist to your second knuckle, there is enough. If not... time to water.
Mulch will help retain moisture longer.
STEP TEN:
Keep notes
- in a journal, a notebook, or on pieces of paper
(but don't lose them)
You can be as fancy or plain as it suits you, but do find a place to keep your notes.
Add photos as you go so you can see where you were and how much you have accomplished. Photos will also give you a good idea what should come next.
You will want to know what, where and when you planted that favourite plant - oh, and how much you paid for it and where you bought it. If you love it and it performs well, you will want more.
(I like to plant in odd numbers... 3's or 5's- it shows off the habit of the plant better and gives you a clump instead of one lonely plant in the middle of a bed).
You will also want to know what worked and what didn’t.
Oh, and keep those tags. You will be surprised how often you will read them again.
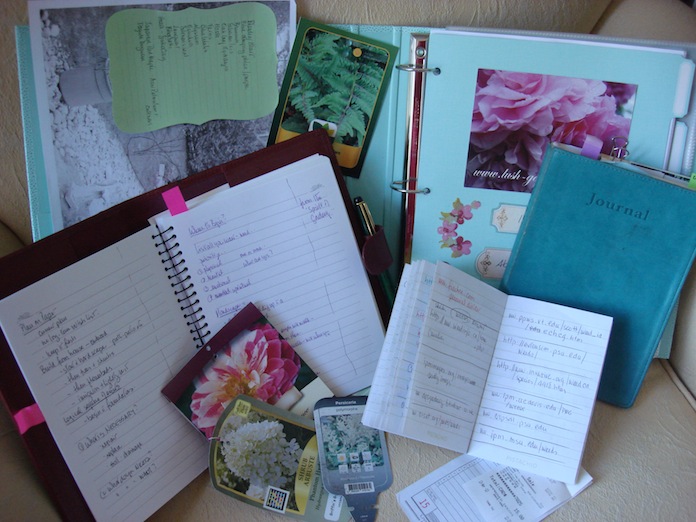
Here is a variety of journals. Notebooks, big and small or loose leaf binders for folks like me who keep adding pages.
In the back of my binder, is a plastic page made for business cards; guess what it holds? Plant tags !
Here is some of the info I put into my binder. Before and after photos.
 |
 |
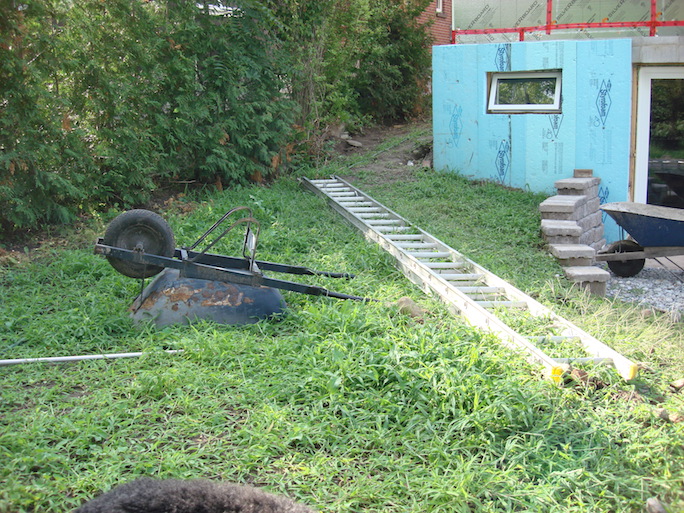
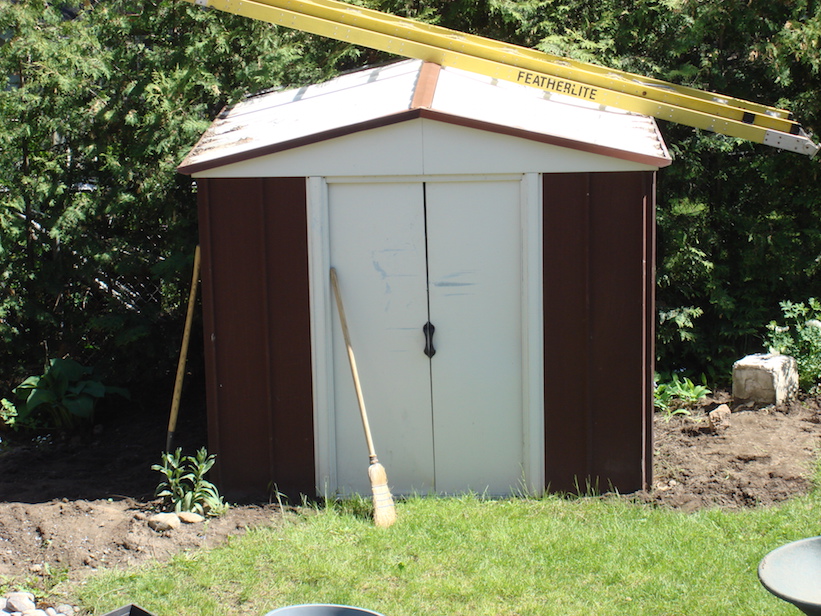
This old, brown tin shed has been tarted-up for awhile, so it is easy to forget how ugly the poor thing was.
Good to remember.
|
|
 |
Before and after.... 3 years - and yes, 10 steps... some were quicker than others, and some took a long time. But I did take each step- not always in order, but all of them.
|
|
 |
The boulders before - and after the garden was
in for 2 years.
|
|
 |
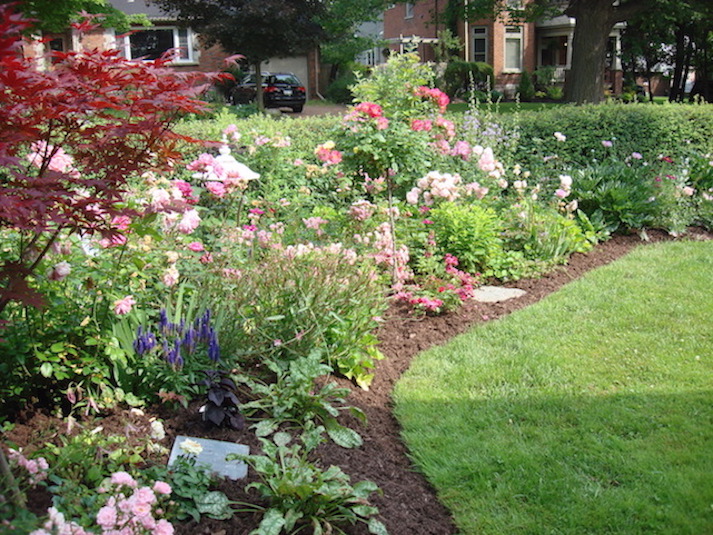
Remember the crab grass above? Here is the rose bed looking in the opposite direction and below, looking up at the start of the new rose bed.
LAST, BUT NOT LEAST.
Most of all, enjoy your garden every day.
Walk in it, sit and think in it.
Appreciate and know you are creating a work of art.
You can make changes as you go, keep what you like and "shovel-prune" what you don't. Or, you could trade some of your plants for someone else's.
And, remember to leave space for the birds and the wind to plant what they like in your garden.
IF YOU WOULD LIKE A FREE PDF OF THIS PAGE, PLEASE
oops, sorry, link was broken but is now fixed! ...yay!
